Now that we have discussed taking photos with your iPhone, we can move onto the editing. Editing is very important and can help turn an “OK” photo into a great photo! Here are some tips we have when editing your photos using only your iPhone:
There are a few main tools that you’ll probably need when editing every single photo.
We are going to give you a little run-down of the three main tools that you’ll likely need when editing a photo, aside from the filter or preset. They are:
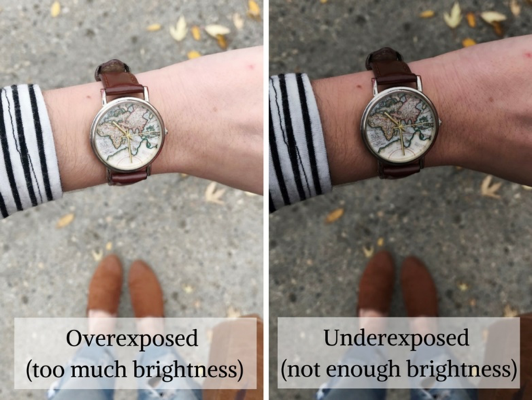
- Exposure – adjusts how light or dark the photo is
- Sharpen tool – makes the photo clearer and crisper
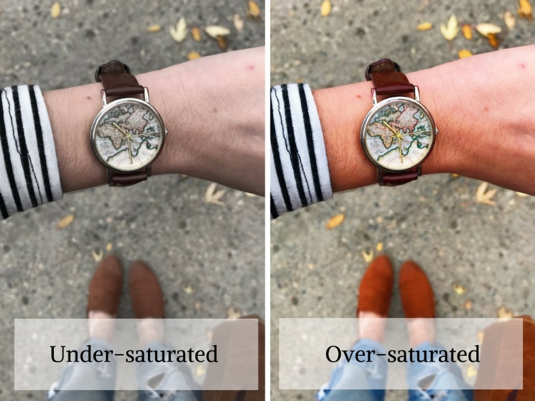
- Saturation tool – adjusts how intense the colors are in your photo

Choose a filter that matches your brand’s style, and stick with it.
If you use the same filter on all your photos, this will likely make your feed look much more cohesive and put-together. We suggest using the app VSCO to find your filter, as it has many amazing options that are subtler and more natural than the built-in Instagram filters. Find a filter that looks good on most of your photos, then stick with it. But remember, adding a filter isn’t a slap-it-on-and-go kind of thing. You need to tweak each photo to make sure the filter matches your brand’s aesthetic, typically by adjusting the brightness and contrast. If you need convincing that a filter is a good idea, here’s a fact for you: According to a study by Yahoo Labs, “Filtered photos are 21 percent more likely to be viewed and 45 percent more likely to be commented on.” You want to get in on that!
Don’t edit purely with Instagram.
There are so many great editing apps out there that have much more advanced editing capabilities than Instagram. Even better, they’re also free. Here are some apps that we enjoy and recommend:
- VSCO – great for all your basic editing needs and for adding filters over your photos, as they have many beautiful and subtle options
- Afterlight – has several fun features that you can utilize such as adding borders around your photos, adding fun textures and layering one photo over the top of another
- Lightroom – has primarily more advanced features, such as adjusting the hues and saturation of specific colors within a photo
- Canva – can be used to layer text or graphics over your photos
Some editing styles just aren’t cool anymore.
There are some editing techniques that are just not “in” anymore! You should know what they are, and try to avoid them. For example, vignettes just aren’t appealing to most people anymore. Typically, photos with very high color saturation aren’t as appealing anymore either. It appears on-trend editing is leading more toward a subdued, crisp style. Does this mean that you can’t use bright colors anymore? Absolutely not! It just means that those bright colors shouldn’t be oversaturated.
When uploading your photos onto Instagram, use this little editing trick.
Once you’ve edited your photo and you’re ready to upload it Instagram, we have a little tip for you. As many people know, Instagram takes away some of the quality of the photo and makes it slightly more blurry and pixelated. To combat this, we suggest that you sharpen your image within the Instagram app right before uploading. It will make your image look a little crisper and high-quality once it’s uploaded!
Use the copy and paste feature within VSCO.
If you are editing several photos from the same location and lighting circumstances, you can copy and paste your edits from one photo to the rest of them. This can save you a lot of time and ensure that all your photos from the shoot are edited the same, thus making them cohesive. To use this feature, simply click on the photo that you just edited > click the three dots in the bottom righthand corner > click “copy edits” > choose the photos you’d like to paste the edits onto > click the three dots in the bottom righthand corner > click paste edits. That’s it! It will then copy your exact edits onto the photos you selected, then you can make minor tweaks accordingly.
You can change the saturation and hue of specific colors in the Lightroom app.
If you are working toward a cohesive Instagram feed, this tool can be extremely useful. Say you took a photo in front of a bright red wall and the wall is both distracting to the image and it doesn’t mesh well with the rest of the photos on your feed. With the Lightroom app, you can change this color. Upload a photo within the app, go to Color, then select Mix in the upper right corner of the tool bar. Once you’re there, you can select the color that you’d like to change, in our case red, and you can adjust the bars to find the perfect saturation and hue of your selected color. Handy, right? This tool can be beneficial in a variety of situations, though it may not be something you use every day.
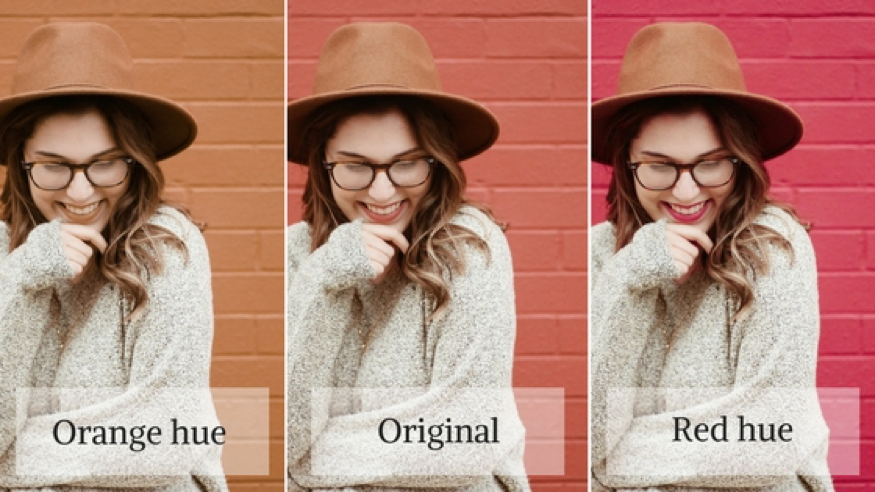
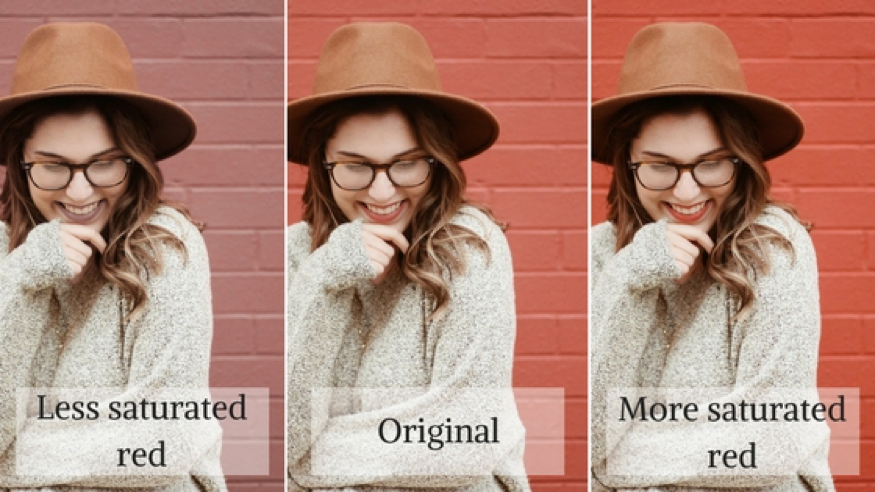
*In our example photos, notice how the subject’s lips are red so their color is changed along with the wall.
There you have it. You’re ready to start editing your photos on your iPhone like a pro! Next, we’re going to give you the final step to maximizing your iPhone’s content creation abilities by sharing a blog post about taking videos with your device. Stay tuned…